
A Shop item works similarly to a pay-per-view post, but with one key advantage: it lives inside a dedicated e-commerce storefront on your profile, making your content much easier for fans to discover and buy.
This step-by-step guide will walk you through setting up and managing your digital store so you can directly monetize digital downloads, curated collections, and pay-per-view media.
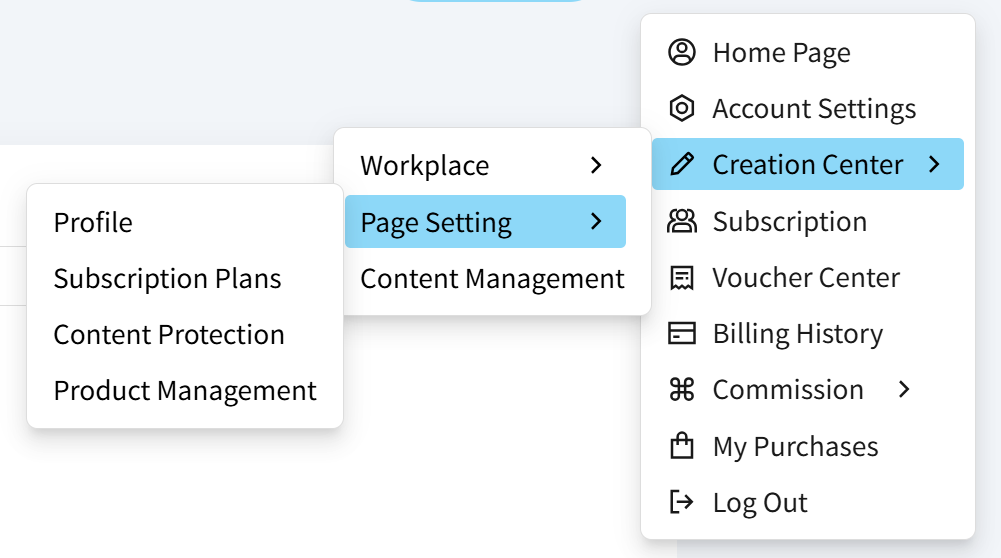
1. Navigate to your main profile menu, and select the product management option to open your storefront dashboard.
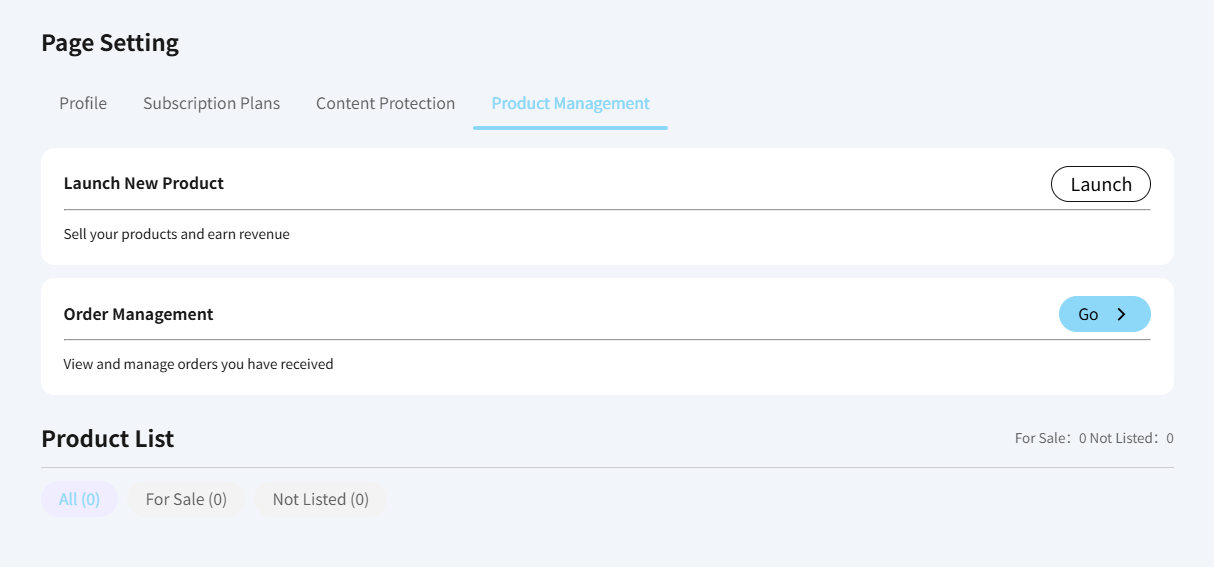
2. Clicking launch will open the setup editor for your new product listing.
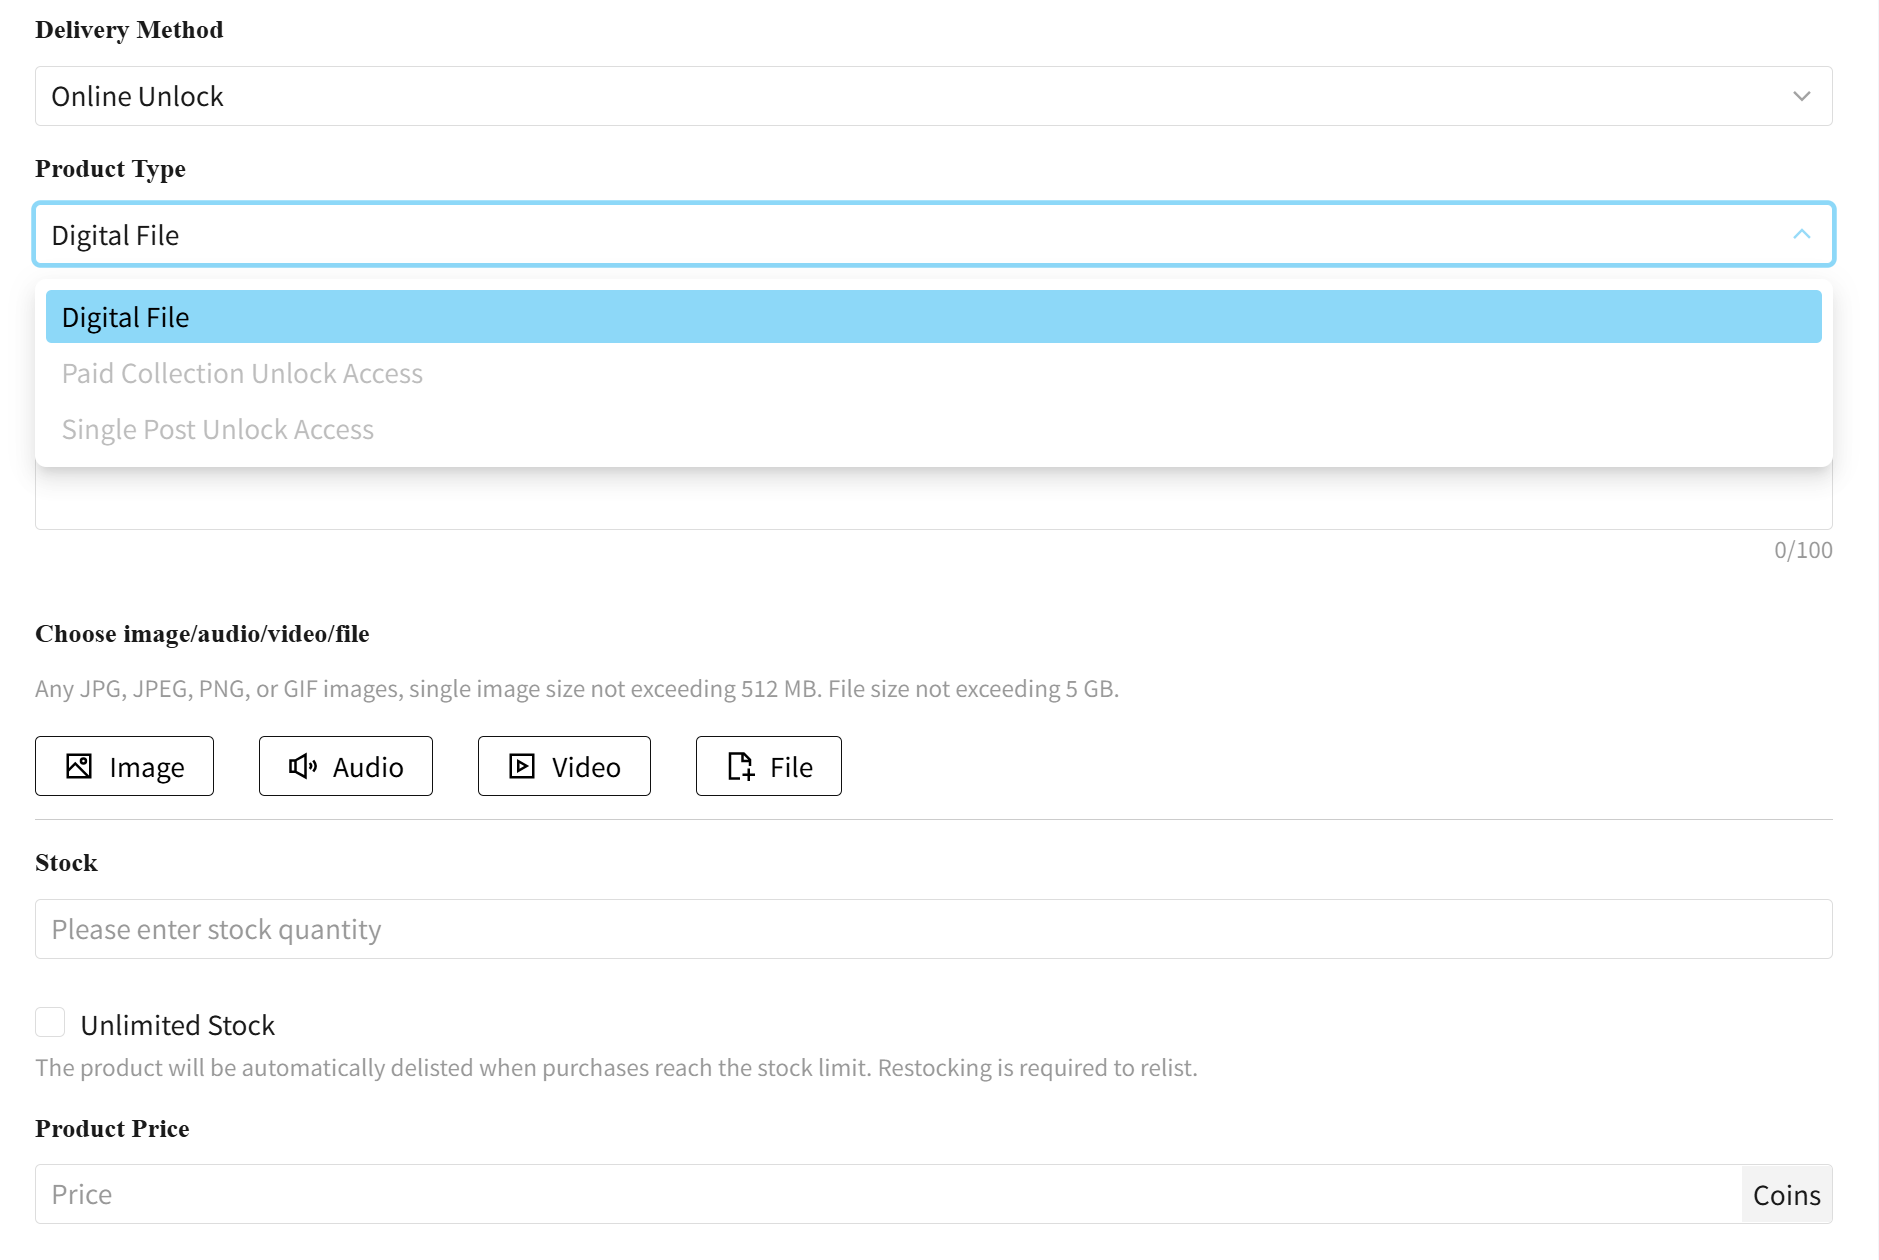
3. Fill out your product details and select the specific format that fits your content. You can choose from three distinct options:
Product Type:
Digital File: Choose this to upload a single asset. The system supports image, audio, video, or general file downloads.
Paid Collection Unlock Access: Choose this if you want to bundle and sell access to one or multiple of your curated content collections inside a single product listing.
Single Post Unlock Access: Choose this to sell pay-per-view access to specific posts as an individual item.
Stock: When an item goes out of stock, its status automatically changes to Not Listed on your creator account, meaning it will be hidden from public view and external search.
If you decide to edit the price of an existing product later on, the change will only apply to future buyers. It will not affect users who have already purchased the item.